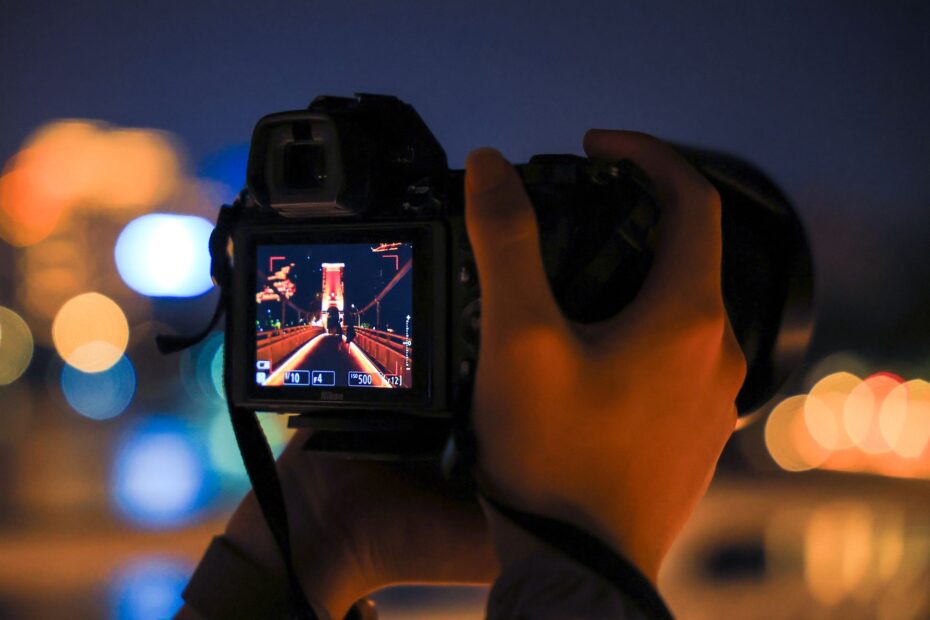
In a crowded market frame, arranging the subject, space, light, and direction helps a photo communicate what matters about a place. A road leading toward a lone walker can turn a familiar view into a sense of arrival, distance, or solitude rather than a simple destination record.
This field method helps you frame streets, landscapes, markets, architecture, and landmarks under real travel pressures such as crowds, harsh light, limited access, and phone shooting.
A Clear Story Gives the Frame Its Purpose
A famous view can still produce a forgettable image. Your camera records everything inside the frame, while your framing choices decide what draws attention and what recedes.
Travel photography composition brings together four parts: subject, space, light, and visual direction. Those parts can show the scale of a canyon, the rhythm of a market, fog around a harbor, or the geometry of a mosque courtyard.
One frame needs one dominant idea
Name the idea before raising your camera. Your subject could be a mountain peak, a child chasing pigeons, a tile pattern, a vendor’s hands, or a tower rising above a street.
That choice separates an intentional photograph from a record shot that only proves your arrival. A wide view of Dubai’s skyline can show scale, while a tight frame of one window cleaner high above the street can show human effort within that scale.
Composition tools serve the story
Seven familiar tools appear in travel photography for beginners: the Rule of Thirds, Leading Lines, Framing, symmetry, patterns, depth, and Negative Space. Your frame does not need all seven tools at once.
- Rule of Thirds: Place a subject near a grid intersection to give an off-center subject visual energy.
- Leading Lines: Use roads, rails, rivers, shadows, or shorelines to guide attention toward the subject.
- Natural Framing: Use arches, windows, foliage, doorways, or train doors to contain the focal point.
- Symmetry and patterns: Use repetition or mirrored structure to show order, rhythm, and architectural form.
- Depth and space: Use layers or open areas to show scale, mood, and distance.
One clear device carries more force than six half-used ideas. Your next task is to give the eye a landing point before asking it to follow a line, pattern, or layer.
A Strong Subject Controls Visual Hierarchy
Your eye needs a landing point in a fraction of a second. Without one, a crowded plaza, colorful market, or dramatic coastline feels scattered despite the scene’s visual interest.
Start with a short phrase: “the red umbrella,” “the clock tower,” “the woman at the stall,” or “the ridge line.” This habit stops you from photographing a scene simply because it looks busy or beautiful.
Visual hierarchy directs attention
Size, brightness, sharpness, color, placement, and Subject Isolation shape visual hierarchy. Your subject does not need to fill the frame, but it needs a stronger pull than nearby details.
A yellow raincoat against gray stone stands out through color contrast. A sharp face against a softer crowd stands out through focus, while a tiny person crossing pale sand stands out through Negative Space.
Check the edges before pressing the shutter. A cropped elbow, bright trash bin, or sliver of parked car can pull attention away from your intended subject.
Small movements clear busy scenes
Busy destinations respond better to physical changes than menu settings. Move two steps closer, raise the camera above shoulder height, crouch below a railing, turn toward a quieter background, or wait through one passing group.
At a market in Abu Dhabi, a broad frame can contain signs, shoulders, plastic bags, and competing stalls. Narrow your angle toward one exchange of hands and goods, then leave a darker strip of background behind the action.
That small change gives the exchange priority without removing the market setting. Once your subject holds attention, placement tells the eye where to travel next.
Placement and Open Space Guide the Eye
An off-center subject can feel active because the open area around it carries tension. Centered placement can feel equally strong in a formal hallway, mirrored reflection, or direct portrait where stillness is the point.
The Rule of Thirds creates active placement
Divide the frame into nine equal rectangles with two horizontal and two vertical grid lines. Place a person, peak, or landmark near an intersection, and the surrounding space begins to show where your subject has been or where it seems headed.
Centered placement suits symmetry and confrontation. A doorway in the exact center of a palace façade feels deliberate and formal, while moving that doorway to one side can weaken the architectural order you came to photograph.
| Placement choice | What it suggests | Travel example |
|---|---|---|
| Off-center subject | Movement, anticipation, openness | A hiker facing an empty valley |
| Centered subject | Order, formality, directness | A temple door viewed straight on |
| Subject near an edge | Tension or departure | A train leaving the frame |
| Small subject in open space | Scale and isolation | A person beneath desert dunes |
Lines and Negative Space need a destination
Leading Lines work only where they end at something worth seeing. A shoreline leading to a lighthouse gives your eye a destination; a railing that exits through a lower corner sends attention out of the photograph.
Look for roads, rivers, rail tracks, beach curves, rows of lanterns, building shadows, and repeated columns. Shift your position until the line enters from an edge and travels toward the focal point rather than cutting across it.
Negative Space is empty area with a job. You can place a small traveler against fog, water, sky, or a plain wall to show scale and mood.
Directional choices become flat without depth. A line can pull your eye forward, but layered distance makes that movement feel like a place you could enter.
Foreground, Middle Ground, and Background Create Depth
A distant mountain alone can look flat. Put a weathered fence post, wildflower, rock, café table, or person near the camera, and your frame gains a near point, middle distance, and far horizon.
Foreground interest gives your eye a starting place. The middle ground carries the main action or landmark, while the background establishes the wider location through mountains, apartment blocks, sea, sky, or old roofs.
Layers give scale meaning
Set a nearby object against distant scenery, then leave enough separation for each layer to remain clear. A backpacker at the entrance of an arch can show the arch’s size, the street beyond it, and the city around it in one frame.
People have a practical role beyond decoration. Your figure at a safe distance can show the width of a canyon, height of a cathedral, or density of a transit station.
Keep that person distinct from the background through color, light, or placement. A red jacket against pale limestone gives the figure more visual weight than a gray jacket against gray stone.
The 20-60-20 composition rule offers a starting ratio
A useful frame can be split into rough shares: 20 percent foreground, 60 percent main scene, and 20 percent background or sky. It gives you a quick way to avoid a landscape made entirely of distant scenery.
Use the ratio as a prompt rather than a law. A stormy sky can deserve half the frame, while a narrow old street may need almost no sky.
| Scene type | Near layer | Middle layer | Far layer |
|---|---|---|---|
| Coastal landscape | Tide pool or rock | Breaking wave | Headland or horizon |
| Old city street | Café chair or paving stone | Pedestrian or bicycle | Church tower or lane bend |
| Mountain overlook | Wildflower or ridge rock | Trail or hiker | Peak and sky |
| Indoor market | Fruit crate or counter | Vendor interaction | Stall lights or rear aisle |
Depth depends on where you stand as much as what appears inside the frame. Your camera height can make a foreground object loom large or disappear completely.
Position and Focal Length Reshape the Scene
Move your feet before changing exposure or shutter speed. A sideways step can separate a church spire from a light pole, while a low viewpoint can turn plain paving stones into a strong foreground path.
Camera height changes relationships
Crouch to make close flowers, stones, or street textures feel larger. Step back to show a landmark’s setting, or raise the camera above a crowd to reveal shapes and movement that disappear at eye level.
Distance changes the relationship between subject and surroundings. Stand close to a street musician for hands, instrument, and expression; retreat several yards for the musician, passersby, and avenue that explain the performance’s setting.
Focal length changes spatial feel
Wide lenses, such as 24mm or the main lens on many phones, exaggerate objects near the camera and stretch distance between layers. Keep the near object close, since a wide frame without foreground interest can look thin.
Longer focal lengths, such as 85mm or 120mm, compress distant layers. They suit stacked hills, repeating balconies, isolated faces, or a distant tower framed between buildings.
Your field of view narrows with a longer lens, which removes distracting surroundings. Natural Framing adds control through an arch, window, doorway, tree branch, reflected edge, or train door that directs attention inward.
A phone works well here too. On an iPhone, the 2x optical option can simplify a messy street scene, while the main lens suits close foreground and wide environmental views.
Skip digital zoom because it enlarges pixels rather than changing your position. Your position and focal length establish structure; light decides which surfaces move forward and which recede.
Light and Weather Change the Frame
Side light near Golden Hour reveals texture across brick, stone, sand, and mountain ridges. A façade that looks flat at noon gains small shadows around carvings and window frames as the sun moves lower.
Natural light shifts subject placement
Turn your subject toward soft side light for shape and detail. Place a person against a darker background for a clear outline, or turn them into a silhouette against a bright sky where gesture matters more than facial detail.
Harsh noon light needs a different approach. Search for graphic shadows, bright wall color, shaded passages, reflected light, or strong overhead patterns.
At noon, a narrow street in Lisbon can become a study in rectangles rather than a postcard view. Your subject benefits from the hard light once you give the shadows a deliberate role.
Weather supplies visual character
Rain gives you wet pavement, reflections, umbrellas, and separated pools of color. Fog removes clutter and lets a bridge, tree, or traveler emerge from a pale field.
Overcast skies soften contrast, which suits portraits and detailed architecture. Leave room ahead of a walking person or moving bicycle so the action has space to travel.
For a traveler beside a landmark, place each in distinct zones. Your person stays present, and the location remains recognizable rather than becoming a distant blur.
Ask before making a close portrait in a market, place of worship, or private moment. A nod, a brief gesture toward your camera, and a respectful refusal protect both the encounter and your photograph.
Changing light makes speed matter. Your routine needs to work before a gap in the crowd closes or a beam of sun leaves the façade.
A One-Minute Field Workflow Handles Crowds
Start with a sentence rather than a setting. “A traveler beneath the tower” gives you a usable target, while “this place is beautiful” gives you nothing specific to frame.
A fast order reduces clutter
- Name the story: Choose scale, daily life, architecture, movement, atmosphere, or a small detail before framing.
- Find the subject: Use contrast, isolation, color, sharpness, or size to make your focal point clear.
- Select background: Shift your body until signs, poles, bright patches, and passing strangers stop competing with the subject.
- Add direction: Use a path, shadow, repeated form, foreground object, or open area to guide the eye.
- Inspect every edge: Remove cut-off limbs, parked vehicles, and bright fragments before pressing the shutter.
This sequence takes less than a minute after practice. Your shot can remain spontaneous, yet the frame gains purpose before the scene changes.
Four variations reveal stronger choices
Shoot four versions before leaving a strong scene. Start wide for location, move closer for detail, change camera height, then add a person for scale.
Each version answers a different visual need without forcing one frame to do everything. These travel photo composition techniques work especially well at iconic landmarks, street markets, and crowded viewpoints.
| Scene | Strong starting choice | Common distraction |
|---|---|---|
| Landscape | Close foreground plus distant landmark | Empty lower half and tiny horizon |
| Architecture | Symmetry with straight vertical lines | Leaning walls from tilted framing |
| Street scene | Layers, timing, and a clear interaction | Random faces blocking the action |
| Market portrait | Human detail plus visible setting | Background signs crossing the head |
| Iconic landmark | Person placed for scale and separation | Subject lost inside a crowd |
Your camera cannot repair a frame with no clear idea, though editing can strengthen the intent already present. That boundary keeps post-processing from becoming a rescue task.
Editing Refines the Story You Framed
A crop works best as a small correction, not a substitute for choosing your position. Remove edge distractions, straighten a critical horizon, and correct leaning verticals in architecture while leaving enough detail to identify the destination.
Travel photography composition stays honest where the final crop protects the story chosen on location. Cropping a market vendor too tightly can make a strong portrait, but it can erase the market details that gave the image geographic meaning.
Rules give way to stronger intent
Center a face for direct intensity. Use a tight crop for intimacy, leave a large empty area around a small person for isolation, and tilt a frame only where instability or movement is part of the intended feeling.
A centered reflection works because symmetry is the subject. A figure near one edge works because the open space becomes part of the story.
Random imbalance looks accidental because nothing inside the frame explains it. Your visual choice needs a visible reason that a viewer can feel without reading an explanation.
Phone controls reward careful framing
- Turn on gridlines: Your screen grid helps you check thirds, level horizons, and vertical architecture before shooting.
- Use optical lenses: Move closer or switch focal lengths rather than enlarging the image through digital zoom.
- Set exposure manually: Tap the subject, then lower exposure slightly to protect bright skies and pale buildings.
- Watch Portrait mode: Complex hair, branches, railings, and window edges can receive uneven background blur.
- Review variations: Compare wide, close, high, and low views before choosing the frame that states your idea clearly.
These travel photography composition tips matter more than a new camera body. Your strongest habit remains physical: pause, name the subject, inspect the edges, and move until the frame says one clear thing.
Final Takeaways for Stronger Travel Frames
A travel photo becomes memorable through a clear decision about what the place feels like from where you stand. Give your subject priority, use lines or layers to carry attention, and remove distractions before editing.
Your destination supplies the raw material. Your position, timing, focal length, and framing turn it into a specific visual story.
FAQ
How does travel photography composition work for beginners?
Begin with one subject and one intended idea, such as scale, color, movement, or atmosphere. Then choose a background that does not compete, add a line or foreground layer, and inspect the frame edges. Your gridlines can help with placement, but clear subject priority matters more than strict rules.
What are some effective composition tips for travel photography?
Use a close foreground object in landscapes, wait for clean gaps in crowds, straighten architectural verticals, and leave room ahead of moving people. You can also use roads, rails, coastlines, and shadows as visual routes. A short walk sideways changes a weak frame more than a camera setting.
What are the 7 rules of composition in photography?
The seven widely taught tools are the Rule of Thirds, Leading Lines, Framing, symmetry, patterns, depth, and Negative Space. They are visual choices rather than fixed laws. Your image needs a clear subject before any tool can work, since a strong line or pattern cannot rescue an unclear idea.
What is the 20-60-20 rule in photography?
For a balanced landscape, use roughly 20 percent foreground, 60 percent main scene, and 20 percent background or sky. You can use it to avoid flat landscapes and give each layer enough room. A dramatic cloud ceiling or tight city lane can need different proportions, so treat it as a starting prompt.
How do you choose a main subject in a busy travel scene?
Choose the detail with the strongest story, then make it distinct through color, light, focus, size, or empty space. Your physical position matters: move closer, change height, narrow the view, or wait for a gap. A clear subject can be small, provided surrounding details do not compete with it.
How do I make a travel photo show both a subject and a sense of place?
Place your person or object in a distinct area of the frame, then leave enough visible setting to identify the location. A traveler beneath a cathedral arch, beside a market stall, or on a ridge trail shows human scale without reducing the landmark to background decoration.